Set up a remote compilation and execution environment and use NetBeans to debug code running on a Raspberry Pi
2018-01-24
Previous article
Introduction
This is part three of my quest to build BlueTooth Low Energy Peripherals for fun.
The first part showed how to create a rudimentary Peripheral on a Mac. But really, it was to learn about how it’s done on a Mac, and I don’t see much interest in turning your Mac into a Peripheral.
The second part showed how to set up a cross-compilation development environment on a Mac with step-debugging code on the Pi.
This installment is, again, a prep phase, since the method in the second installment does not really work for building a Bluetooth stack on a Mac with cross-compile intentions. This is because the Linux dependencies needed to compile and link the app are not available for the Mac, and implementing them would basically mean implementing a Linux hci and dbus emulator. That would be fun, but my goal is to build a Peripheral…
Sorry, my #fail
So this installment is about setting up NetBeans to actually compile and step through code on the Pi. Yes, I said it was slow, but what choice does a BlueTooth n00b dev have?
The goal of this phase in our Sprint zero, is to have a way to hit “build” on the Mac, have the Pi do the actual build and then run the debugger to step through code that’s running on it.
Here goes:
The revised development workflow is:
- Use the Mac to write code on the Pi. This post is about setting up NetBeans to do so.
- Use the Mac to build (compile and link) the code on the Pi (using its native tool-chain, no more cross-compiling).
- Use NetBeans to debug the code running on the Pi (remotely).
Setup
Right click on the project’s root node to get to its preferences and go from there:
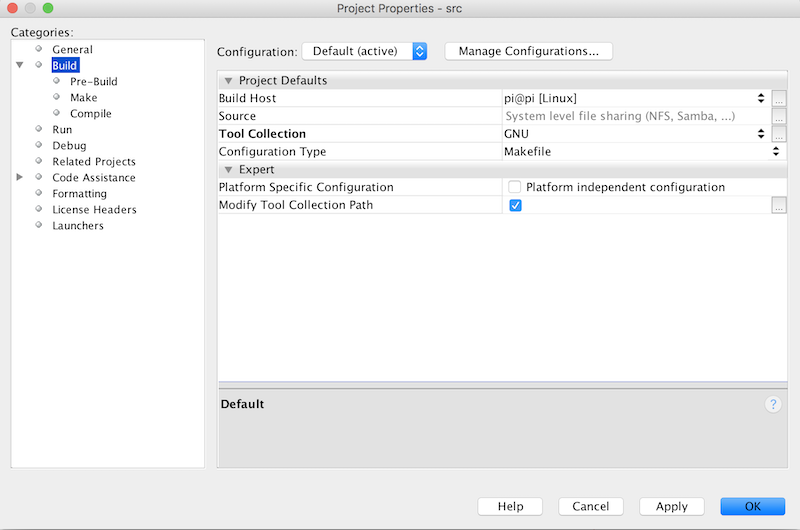
Set up a new Build Host
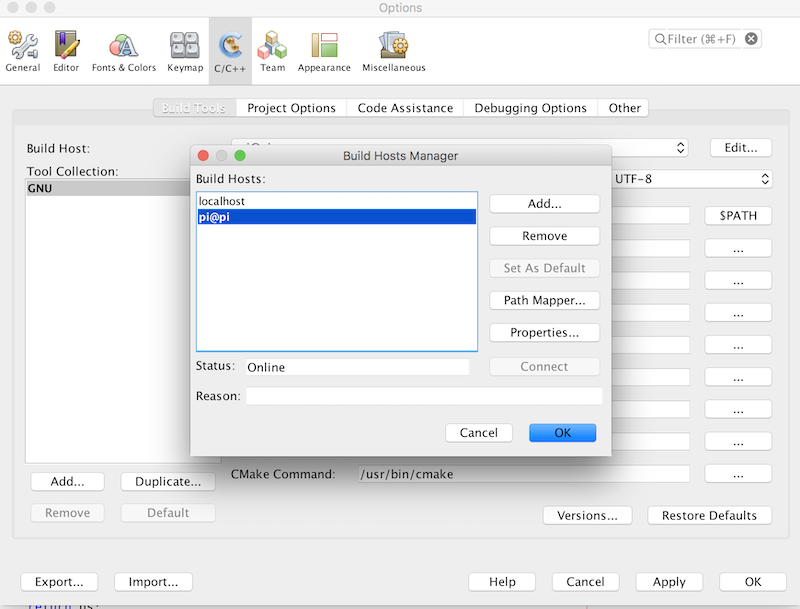
Configure the remote build host
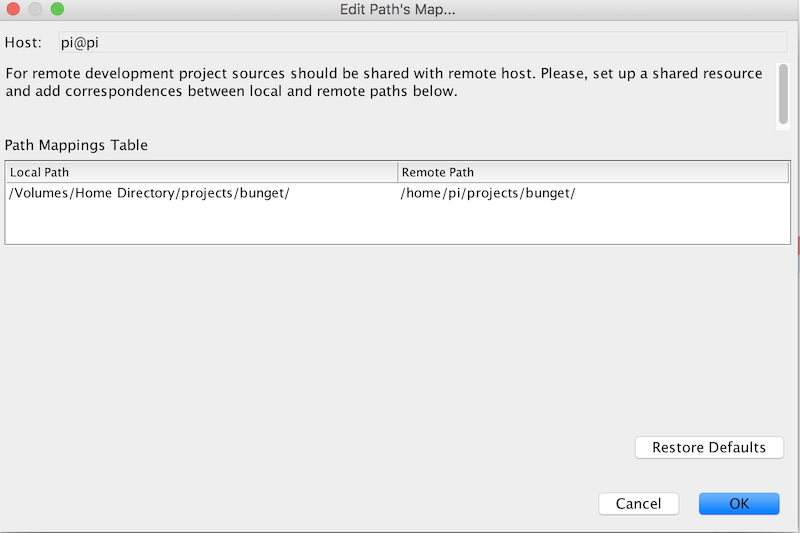
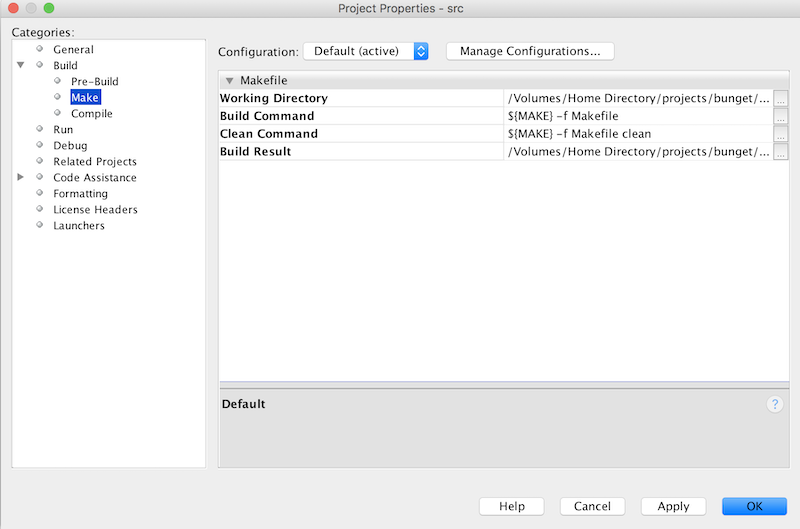
Set up the local and remote directory paths
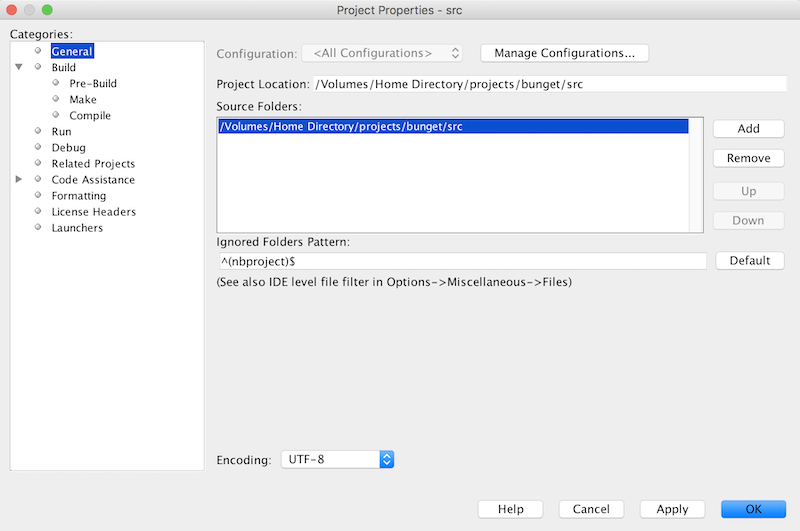
Set up the source folder
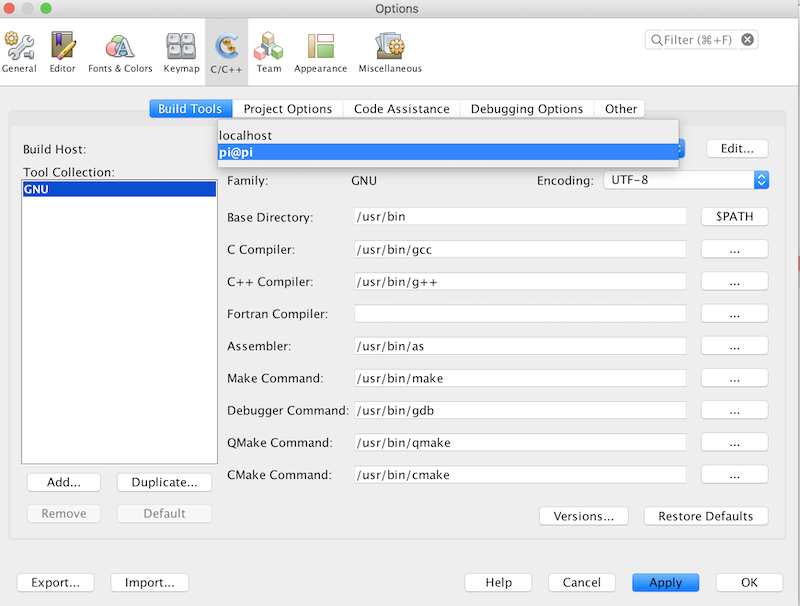
Set up the build host
Set up make working directory
Running & debugging remotely
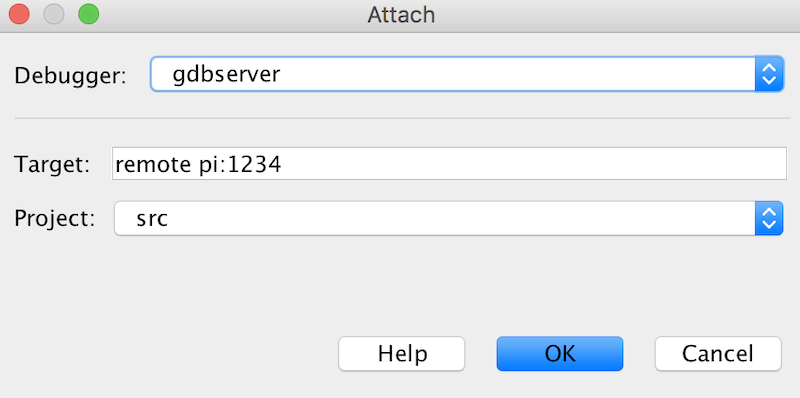
Running the debugger on the Pi
gdbserver :1234 welcome_1
Here you’re telling gdbserer to run the welcome app on port 1234.
Attaching and stepping through the code from the Mac
From the menu, select “Debug”/”Attach debugger” and fill in the form:
- For debugger, select “remote debugger”
- For target, type “remote pi :1234”
‘pi’ is the pi’s host name (I put mine in /etc/hosts)
‘:1234’ is the port with which NetBeans will communicate on your Pi. This has to be the same port number that you selected in the
gdbservercommand above.
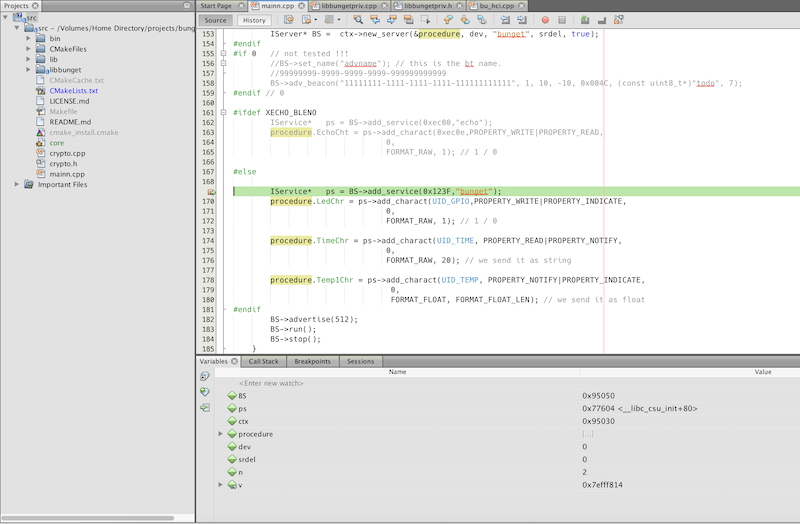
Here’s bunget in action.
I hope you find the post useful!
Happy hacking!
Previous article
Filed under
GNU
Mac OS X
- Bluetooth Low Energy (BLE) Implementing a peripheral on Mac OS X
- Cross-compiling for Raspberry Pi on a Mac and debugging using NetBeans
- Drobo will not mount in Finder
- Quickie - ssh dynamic port forwarding to avoid unsecured public networks
- Weekend warrior - MacRuby and rSpec, Mac OS X Lion, Xcode V4.3.2
NetBeans
Raspberry Pi
Remote compilation
Remote debugging
Remote execution
Other Tags
API GW
AWS
- Programming ESP32 using MQTT with AWS and FreeRTOS
- Quick AWS IoT Setup and test
- Set up AWS API GW with a Typescript authorizer and logging
- Use AWS CodePipline to execute CloudFormation templates
- Use GitHub Actions to deploy your SPA hosted on Amazon S3
- Use an AWS CloudFormation script to create and host an SPA on S3 with SSL and apex/subdomain redirection using CloudFront
- Writing an Alexa skill using Ruby and AWS Lambda (Part 0)
ActiveRecord
Agile
- A review of software development metrics
- Agile programme management brief
- An alternative to current product development metrics
- An alternative to the current product development governance model
- Command & Control Management - The Party Killer
- Document Driven Development
- Inceptions revisited
- Managing multiple stakeholders
- Returns Driven Development
- The tip of the (good) iceberg
Alexa
Analysis
Ansible
BDD
BLE
C
CAB
CloudFormation
- Set up AWS API GW with a Typescript authorizer and logging
- Use AWS CodePipline to execute CloudFormation templates
- Use GitHub Actions to deploy your SPA hosted on Amazon S3
- Use an AWS CloudFormation script to create and host an SPA on S3 with SSL and apex/subdomain redirection using CloudFront
- Writing an Alexa skill using Ruby and AWS Lambda (Part 0)
CloudFront
CloudWatch
Cross-compile
Cucumber
DevOps
Devops
DotNet
Embedded
Fitbit
GNU
GitHub Actions
Governance
How-to
Inception
IoT
Javascript
Jest
Lambda
Mac OS X
- Bluetooth Low Energy (BLE) Implementing a peripheral on Mac OS X
- Cross-compiling for Raspberry Pi on a Mac and debugging using NetBeans
- Drobo will not mount in Finder
- Quickie - ssh dynamic port forwarding to avoid unsecured public networks
- Remote compilation, execution and debugging Raspberry Pi from a Mac using NetBeans
- Weekend warrior - MacRuby and rSpec, Mac OS X Lion, Xcode V4.3.2
MacRuby
Metrics
MySQL
NetBeans
Objective-C
PMO
Product Management
- A path to accelerating value realization
- A review of software development metrics
- Agile programme management brief
- An alternative to current product development metrics
- An alternative to the current product development governance model
- Express initiative kickoff formula
- Inceptions revisited
- Managing multiple stakeholders
- Plan for value delivery
- Pre-prod activity - Futurespective
- Value Stream Mapping
- When planning, it's not only about relative complexity
Programme management
Project Management
- A path to accelerating value realization
- A review of software development metrics
- Agile programme management brief
- An alternative to current product development metrics
- An alternative to the current product development governance model
- Command & Control Management - The Party Killer
- Express initiative kickoff formula
- Inceptions revisited
- Managing multiple stakeholders
- Plan for value delivery
- Pre-prod activity - Futurespective
- Value Stream Mapping
- When planning, it's not only about relative complexity
Quality Assurance
Rails
Raspberry Pi
Remote compilation
Remote debugging
Remote execution
Risk Assessment
Route 53
Ruby
- Alexa on Rails - how to develop and test Alexa skills using Rails
- Arduino programming using Ruby, Cucumber & rSpec
- How to reconnect to a database when its connection was lost
- Oh, the places you'll go...
- Quick AWS IoT Setup and test
- Weekend warrior - MacRuby and rSpec, Mac OS X Lion, Xcode V4.3.2
- Writing an Alexa skill using Ruby and AWS Lambda (Part 0)